Better home espresso.
Chances are you are reading this because your home espresso machine does not live up to expectations.
Perhaps it has even been put in the cupboard. It disappointed you once too often.
Do you utter the words it is not a good machine?
It is fair to say you want good coffee every time. Just like cake, you want it rich and full of flavour.
Good coffee, like a good cake, starts with good ingredients.
Fresh is best (within reason).
Coffee needs to degas. The lighter the roast, the longer the degassing period.
I find 7-10 days after roast is good. [more on this soon]
Once ground, coffee oxidises and begins to lose flavour.
Bean choice.
The better quality of the ingredients, the better the results.
Beans from your local coffee shop will be fresher and generally of better quality than the local supermarket.
Side note:
Not all beans are suitable for espresso. Filter roasted [not to be confused with filter grind] is intended to be brewed slowly without pressure. Espresso coffee is roasted to be extracted fast, under pressure, in +/- 25 seconds.
Grinding.
Burr grinders give you better consistency than a blade grinder.
If you are on a budget, check out your local second-hand shop for a vintage hand grinder. The results will surprise you.
When investing your pretty pennies, a $150 hand grinder will give you better results than a $150 electronic grinder, but you will have to work for it.
Storage.
The bag the roaster packaged your beans in is one of the best places to keep them. Fold the top down, remove the air, and pop it on the shelf.
Next time, scoop the beans. Don't pour them. Less disturbance means less fresh oxygen, and less oxygen means a longer shelf life.
Only put enough beans in your grinder for use now. The hopper is not airtight.
Avoid placing your coffee station in a sun-drenched corner of the kitchen. Temperature stability makes your job easier.
A consistent coffee is a fusion of coffee in (dose), coffee out (yield), and the time it takes.
Remember that cake you baked? Grab out those scales and the timer.
Weighing the dose of your coffee means it is the same every time.
How much should I use?
Let's back this up a bit because not all coffee machines are the same.
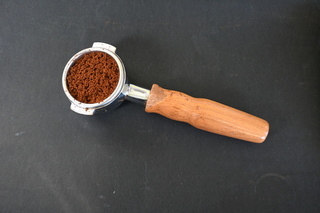
Put your portafilter on the scale and hit zero. Now, dose up as you normally would and weigh it again. That weight, EG: 18g is your baseline now.
Distribution.
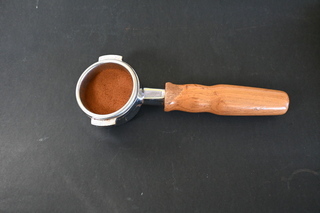
The coffee bed should be flat, free of lumps, just like the flour in that cake you baked.

Tamp evenly.
Do not twist, and definitely do not tap the basket after tamping as this creates cracks for the water to follow.

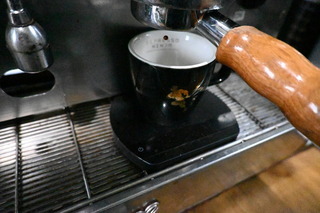
Weigh your favourite cup. (If your scale is too big to fit on the deck of your machine).

Time:
Grab your stopwatch.
Load the portafilter into the group head and pour an espresso.
How long did it take?
The time will vary depending on your bean, taste preference, and so on. There is no right or wrong answer. This is a baseline.
Weigh your cup again. The difference is your yield.
Now tweak your coffee to your taste with the troubleshooting tips below. (I recommend leaving the dose alone).
Troubleshooting:
Issue: Too weak, lacking body, insipid or astringent.
Possibility 1: The coffee has poured too fast. Solution: Make the grind finer.
Possibility 2: The yield is more than 2.5 times the dose.
Issue: Too strong? Burnt or acrid?
The shot poured too slowly.
Most coffees will not like much past < 30-second extraction. Some darker roasts may be best low in the 20 seconds. The solution, adjust the grinder to be more coarse.
Make small adjustments.
Now you are making bangin’ espresso, let's sort the milk.
Common complaint: My machine will not steam the milk hot enough:
There is no easy way to say it. But it is not the machine.
The problem is not allowing enough time for the steam to heat the milk.
Your local cafe knocks out perfect-temperature flat whites pronto thanks to an enormous boiler. Home coffee machines have much smaller heating elements.
The benefit of your home machine being slower to steam milk is more time to perfect silky smooth milk.

Get the air in early. Let the seam want kiss the top of the milk, introducing the right amount of air into your milk. Once you have the desired consistency, submerge the wand and get the milk spinning like a whirlpool. The result is silky smooth milk.
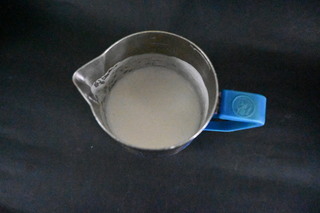
Once hot enough (approx 10 seconds from when the base of the jug becomes too hot to hold). Swirl the jug, then gently tap on the bench to remove the air bubbles. If you have large bubbles, remove these with a spoon before swirling.
Pour your milk immediately after swirling it for better consistency.

This is not an exhaustive troubleshooting guide, but it will help in knowing where to begin.
Posted: Monday 2 January 2023
Recent Posts
Archive
Tags
|
© Copyright Derelict Coffee Roasters |
